
EDIT: I had a post here asking about an OpenOCD error but it turned out to be a known problem with Windows Services for Linux.
Btw, I think this config file name indicates that you’re using old openocd version. It looks like they’ve moved from multiple config files for different versions of St-Link to a single stlink.cfg.
I’m using OpenOCD 10.0.0. This is the newest official release on the website. Is there a newer version?
Looks like that was released in January 2017 and there have been no releases since then. Mine is built from development version source, but I guess last stable release could be good enough - unless there are some unreleased fixes specifically for Windows.
Understood, thanks.
I now have OpenOCD for Windows working and I can successfully run make info on MidiBoot. I’m not sure what steps to use to install MidiBoot. The Makefile contains commands for info, unlock, erase, erase-boot, erase-storage, dump, upload, and lock. I tried “upload” and I got:
$ (cd MidiBoot && make upload)
/mnt/c/Users/Andi/work/gh/OpenWare/openocd/bin-x64/openocd.exe -s C:/Users/Andi/work/gh/OpenWare/openocd/scripts -f C:/Users/Andi/work/gh/OpenWare/Hardware/openocd.cfg -c "program Build/MidiBoot.elf verify reset exit"
Open On-Chip Debugger 0.10.0
Licensed under GNU GPL v2
For bug reports, read
        http://openocd.org/doc/doxygen/bugs.html
Info : The selected transport took over low-level target control. The results might differ compared to plain JTAG/SW
D
adapter speed: 2000 kHz
adapter_nsrst_delay: 100
none separate
srst_only separate srst_nogate srst_open_drain connect_deassert_srst
Info : Unable to match requested speed 2000 kHz, using 1800 kHz
Info : Unable to match requested speed 2000 kHz, using 1800 kHz
Info : clock speed 1800 kHz
Info : STLINK v2 JTAG v17 API v2 SWIM v4 VID 0x0483 PID 0x3748
Info : using stlink api v2
Info : Target voltage: 3.240238
Info : stm32f4x.cpu: hardware has 6 breakpoints, 4 watchpoints
adapter speed: 2000 kHz
Error: timed out while waiting for target halted
TARGET: stm32f4x.cpu - Not halted
in procedure 'program'
in procedure 'reset' called at file "embedded:startup.tcl", line 500
in procedure 'ocd_bouncer'
I thought, maybe I need to run “unlock” first? That didn’t run either:
$ (cd MidiBoot && make unlock)
/mnt/c/Users/Andi/work/gh/OpenWare/openocd/bin-x64/openocd.exe -s C:/Users/Andi/work/gh/OpenWare/openocd/scripts -f C:/Users/Andi/work/gh/OpenWare/Hardware/openocd.cfg -c "init" -c "reset halt" -c "stm32f4x unlock 0" -c "exit"
Open On-Chip Debugger 0.10.0
Licensed under GNU GPL v2
For bug reports, read
        http://openocd.org/doc/doxygen/bugs.html
Info : The selected transport took over low-level target control. The results might differ compared to plain JTAG/SW
D
adapter speed: 2000 kHz
adapter_nsrst_delay: 100
none separate
srst_only separate srst_nogate srst_open_drain connect_deassert_srst
Info : Unable to match requested speed 2000 kHz, using 1800 kHz
Info : Unable to match requested speed 2000 kHz, using 1800 kHz
Info : clock speed 1800 kHz
Info : STLINK v2 JTAG v17 API v2 SWIM v4 VID 0x0483 PID 0x3748
Info : using stlink api v2
Info : Target voltage: 3.237062
Info : stm32f4x.cpu: hardware has 6 breakpoints, 4 watchpoints
adapter speed: 2000 kHz
Error: timed out while waiting for target halted
TARGET: stm32f4x.cpu - Not halted
in procedure 'reset'
in procedure 'ocd_bouncer'
How should I proceed? Also, I assume make upload is installing just the MidiBoot elf; is there a command to install the Magus elf I can run after that?
Posted this link already here - Make Owl Great Again! - #17 by mars
The bootloader gets write-protected as part of upload process to prevent accidental writes.
Also, once you get openocd to work, this may be good time to figure out how to use debugger. I can make a short guide for vscode if that would help.
Thanks… however reading that link it seems to be the instruction is
make PLATFORM=Magus clean all unlock flash
Unlock gives me only the “timed out while waiting for target halted” (same if I try $OPENOCD -c "init" -c "reset halt" -c "exit" as the docs seem to suggest).
Here is something interesting: If I try $OPENOCD -c "init" -c "halt" -c "exit", it appears to succeed. It says “target halted due to debug-request, current mode: Thread”. Is it possible it’s failing to halt because it’s already halted??
Or, do you suppose my pins might be plugged in wrong? I think it must be at least receiving power because the chip is warm when I touch it.
this may be good time to figure out how to use debugger. I can make a short guide for vscode if that would help.
Well, if a vscode or command line tutorial existed I’d definitely try it out before reassembling the unit! And I’d definitely link it in the tutorial I myself am writing. However remember, because I had to disassemble the unit to attach the debugger, the white board is not plugged into the IO board or any of the other hardware. Is there anything useful you can do with the debugger when the white board is just sitting alone on a tabletop?
If I change reset halt to halt in the Makefile, it seems to work. Hm. Experimenting…
It looks like it’s the problem with reset that I’ve mentioned before. You can try commenting out “reset_config srst_only” in Hardware/openocd.cfg. There’s another line in the bottom of that file that may be used instead. Or it may work if you comment out both lines and use default settings used by openocd.
Is there anything useful you can do with the debugger when the white board is just sitting alone on a tabletop?
Well, it’s not terribly interesting without the attached board, it would probably fail or hang somewhere during device initialization for unconnected peripherals. But you can at least use it to step-through bootloader initialization in order to have some idea how debugging works, what you can see in debugger (variable state, peripherals and CPU registers, disassembled code, memory contents, etc).
It looks like it’s the problem with reset that I’ve mentioned before. You can try commenting out “reset_config srst_only” in Hardware/openocd.cfg.
Great, thanks so much! Commenting this line out worked (as long as I did NOT uncomment the final line). I was able to run make upload. It gave me “Verified OK”. (make flash also worked.)
My questions at this point are:
- Is there a difference between
make flashandmake upload? I don’t findmake flashin the appropriate Makefile. - What would uploading Magus.elf look like? Would
$OPENOCD -c "program Magus/Build/Magus.elf verify reset exit"probably just work?
Running OPENOCD “program” just worked! Maybe I will try reassembling now. Antisvin, if you want to provide any help or references on running a debugger, I will link them in my guide and probably I will have cause to try them out myself later.
“make upload” is the correct command to use. The other one was either Martin’s brain fart or it could be renamed.
If you upload FW like that, it will overwrite bootloader. It’s possible to specify address for upload to upload, so that FW would land where it’s supposed to be stored. But the easiest way is just to restore bootloader if necessary and load firmware over MIDI.
Made a separate thread for this. Sorry if there would be any mistakes in config - it’s edited copy of what I’m using on other device currently.
@antisvin, thanks so much!
Is there a trick to inserting the IO board? If I just stick it in where it seemed to have been before, the parts are all sticking out through their holes at a slight angle. I don’t seem to be able to push it down enough for the parts to go through straight.
I don’t remember doing anything special, it should align when you push the USB device port through the case and tighten the nuts on jacks.
Hm, so I encountered something sort of bad. Maybe this is a @mars question.
I installed first MidiBoot.elf, then Magus.elf (before I saw antisvin’s warnings… I had hoped that the ELF files would know to install the two at different offsets) and then reassembled the unit. I decided to initially power it by USB because that is more convenient. I plugged it into the USB hub on my Windows machine.
When I plugged it in, Windows displayed a popup saying “power surge on USB port. the device tried to request more power than the USB plug can supply”. After this, neither the hub nor the PC USB port the hub had been plugged into worked until I restarted Windows. After restarting Windows the hub and the PC USB port both worked fine. Plugging the Magus into the hub used to work.
After this, I got out the Magus AC adapter and plugged that in. The screen did not turn on.
What would be the best way to proceed? Should I go back and reinstall MidiBoot.elf instead of Magus.elf?
Midiboot has a setting for limiting current, not sure how exactly it works. @mars - maybe it should be set by default in devices.h instead?
#define USBD_MAX_POWER 100 // 100mA for iPad compatibility
Midiboot has a setting for limiting current, not sure how exactly it works
Interesting-- would this be something that changed? Again, I’ve successfully used USB before the reflash.
I think it’s OK to draw a reasonable amount of power, after all, I’m hoping to simultaneously plug it in to USB-HOST and plug in USB DEVICES at the same time (if this has any chance of working…)
First off make sure that the digital board is correctly fitted and no pins are bent out of shape.
Sounds like something is not correctly aligned. There’s a photo somewhere - ah yes:
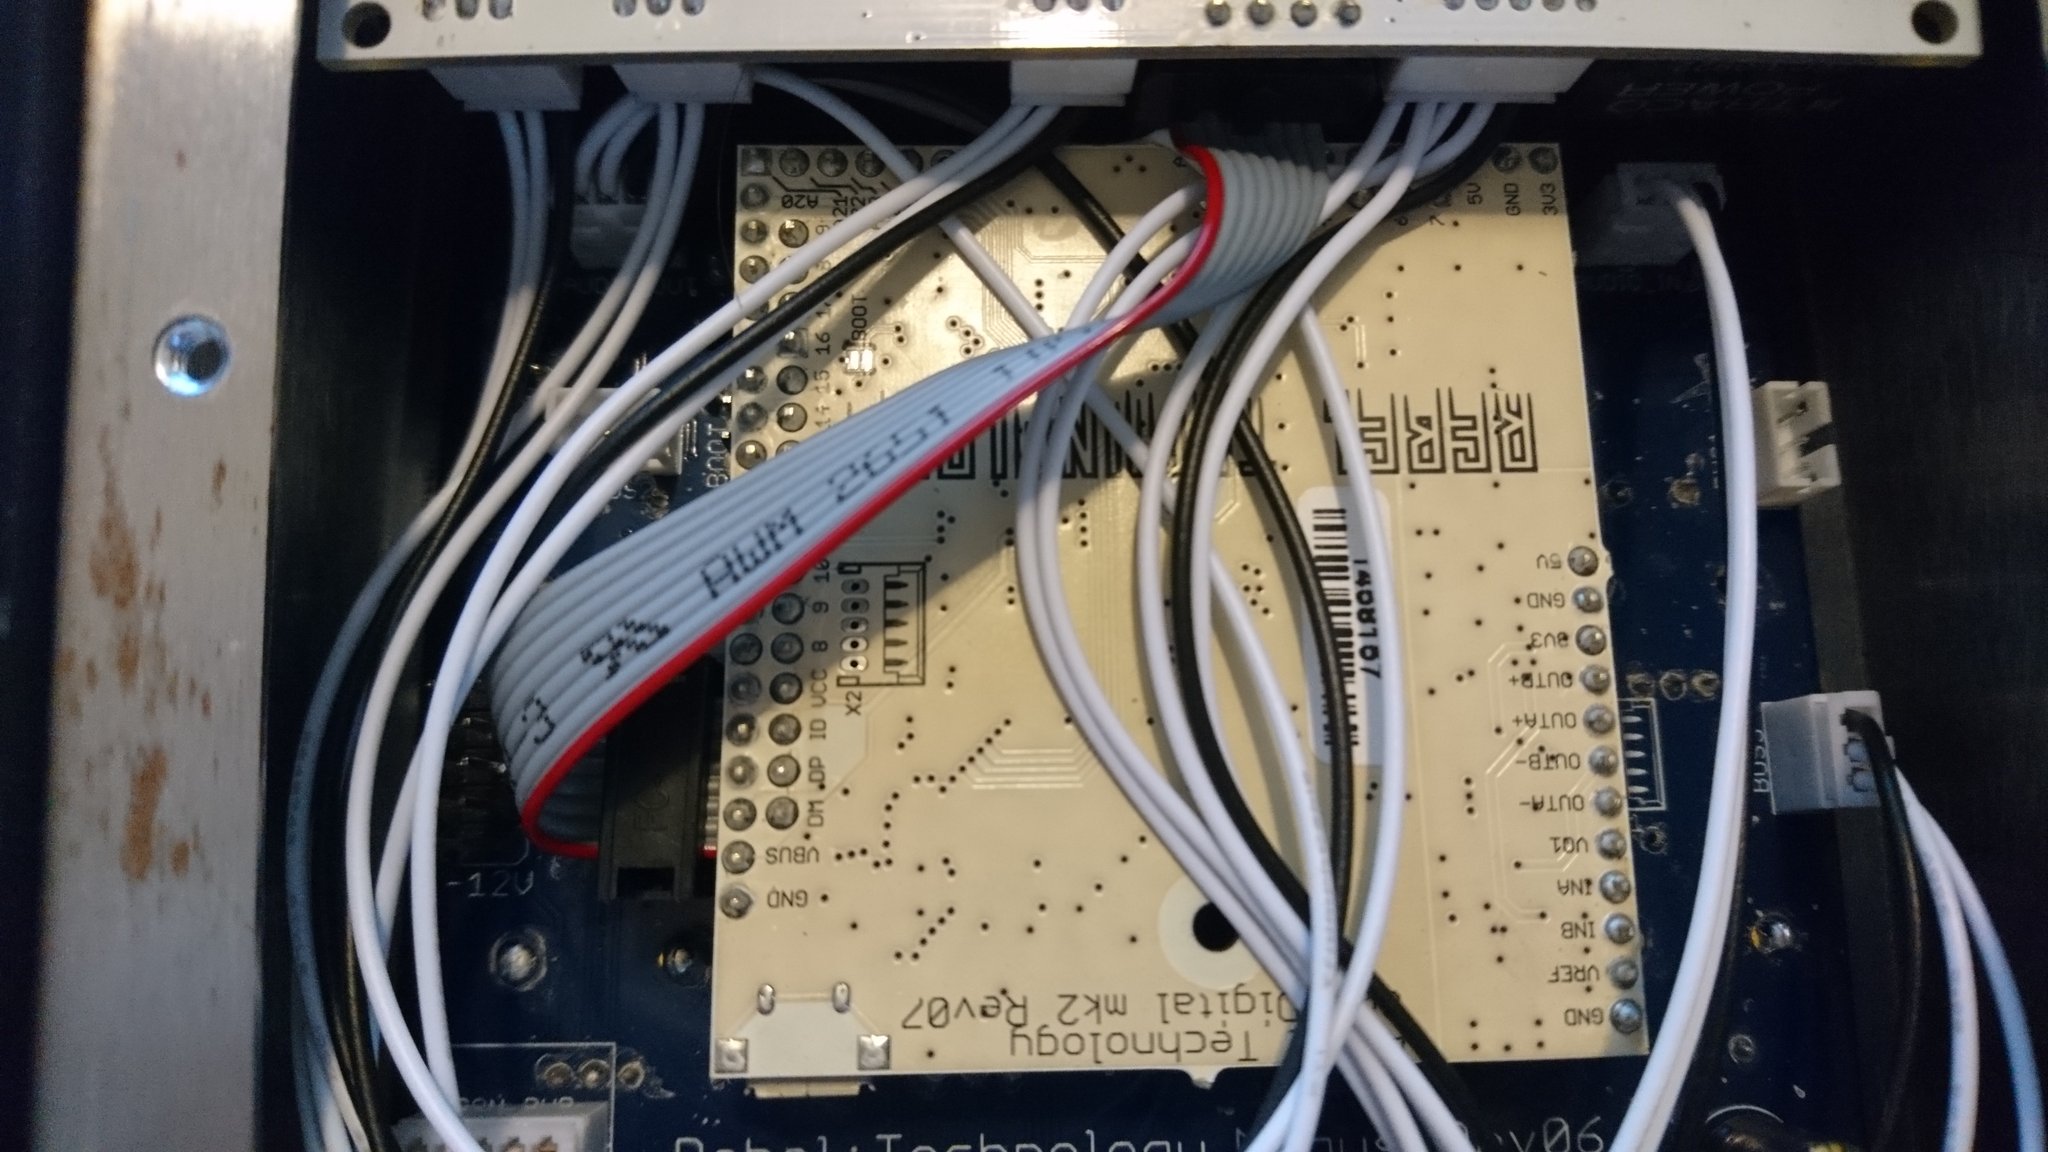
it looks like this?
Pretty sure that the question was about IO panel, not digital board. Anyway, I’ve taken it out and I think I understand the described issue. The panel comes in under a slight angle first, then you need to push it gently to set all connectors in place. This makes a sort of soft click sound.